1. 什么是C++
C++是一种功能强大、灵活且高效的编程语言。它结合了C语言的高性能和面向对象编程的现代设计理念,同时支持泛型编程等高级特性。C++被广泛用于系统软件、游戏开发、嵌入式系统、大型企业应用等领域。
1.1 C++的历史与发展
C++最初由Bjarne Stroustrup在20世纪70年代后期至80年代初开发。当时,他在C语言的基础上添加了一些面向对象的特性,并将其命名为“C with Classes”(带类的C语言)。1983年,这种语言正式命名为C++,其中“++”表示自增运算符,象征着语言的不断发展和增强。
重要里程碑:
- 1985年:C++第一个正式版本发布,同时《The C++ Programming Language》一书出版。
- 1998年:C++标准化,ISO/IEC发布C++98标准。
- 2011年:C++11发布,引入大量现代特性,如Lambda表达式、智能指针、右值引用等。
- 2014年:C++14进一步完善C++11,增加了一些小改进和新特性。
- 2017年:C++17发布,引入文件系统库、并行STL算法等。
- 2020年:C++20成为最新标准,引入概念(Concepts)、范围(Ranges)等革命性特性。
- 2023年:C++23发布,继续增强语言的易用性和效率。
1.2 示例:简单的Hello World程序
以下是一个完整的C++程序,用于打印“Hello, World!”:
#include <iostream> // 包含输入输出流库
using namespace std; // 使用标准命名空间

int main() {
    cout << "Hello, World!" << endl; // 输出 "Hello, World!"
    return 0; // 返回0表示程序成功执行
}
程序解析:
#include <iostream>:引入标准输入输出库,用于使用标准输入cin和标准输出cout。using namespace std;:声明使用标准命名空间,简化标准库名称的调用。int main():C++程序的入口函数,main是程序运行时首先执行的函数。cout << "Hello, World!" << endl;:通过cout向标准输出打印“Hello, World!”。return 0;:表示程序运行成功并正常结束。
1.3 C++的特性简介
C++的特性为其提供了强大的表现力和高效的执行能力,使其成为一门兼具灵活性和高性能的编程语言。
1.3.1 面向对象编程
C++是第一个支持完整面向对象编程的语言之一,主要特性包括:
- 类与对象:通过类定义对象,实现代码的模块化和抽象。
- 继承:支持单继承、多继承,以及虚拟继承,用于代码复用和扩展。
- 封装:使用访问控制符(如
public、protected、private)隐藏内部实现。 - 多态:通过虚函数实现动态多态,增强代码的灵活性。
示例:类与继承
#include <iostream>
using namespace std;

class Animal {           // 父类
public:
    virtual void sound() {
        cout << "Animal makes a sound." << endl;
    }
};

class Dog : public Animal {   // 子类,继承父类
public:
    void sound() override {   // 函数重载
        cout << "Dog barks." << endl;
    }
};

int main() {
    Animal* pet = new Dog();
    pet->sound();  // 输出 Dog barks.
    delete pet;
    return 0;
}
1.3.2 泛型编程
C++支持通过模板实现泛型编程,从而编写与类型无关的代码,同时保证类型安全和高效性。
示例:函数模板
template <typename T>
T add(T a, T b) {
    return a + b;
}

int main() {
    cout << add(10, 20) << endl;  // T为整数类型,输出 30
    cout << add(1.5, 2.5) << endl;  // T为浮点数类型,输出 4.0
    return 0;
}
1.3.3 高性能
C++延续了C语言的高效性,支持底层操作(如指针、内存管理),并通过编译优化和直接硬件交互实现高性能。
1.3.4 标准库(STL)
C++的标准模板库(STL)提供了丰富的容器(如vector、map)、算法(如sort、find)和迭代器,极大地提高了开发效率。
示例:STL使用
#include <vector>
#include <algorithm>
#include <iostream>
using namespace std;

int main() {
    vector<int> nums = {4, 2, 3, 1};
    sort(nums.begin(), nums.end());
    for (int n : nums) {
        cout << n << " ";
    }
    return 0;
}
1.3.5 现代特性
从C++11到C++20,语言增加了大量现代特性,包括:
- Lambda表达式:支持匿名函数。
- 智能指针:简化内存管理,避免内存泄漏。
- 异步编程:支持线程、异步任务和协程。
- 文件系统库:简化文件操作。
2. 开发环境配置
2.1 安装编译器和工具
C++开发需要用编辑器来完成对C++代码的编写,然后通过C++的代码转换为Linux系统可执行程序,这个过程就需要编译器,在bianbu操作系统已经内置跨平台开源编译器g++,然后通过支持多平台的轻量级编辑器VS Code来编写代码,就可以完成C++开发环境的配置。
2.2 安装g++
如果出于某种原因没有内置g++或者g++已经被卸载,可以用下面这个命令来安装g++:
sudo apt update
sudo apt install build-essential
g++ --version     # 验证安装是否成功
2.3 编译与运行
创建源代码文件 hello.cpp:
#include <iostream>
using namespace std;

int main() {
    cout << "Hello, World!" << endl;
    return 0;
}
编译运行:
g++ hello.cpp -o hello
./hello
3. C++的基础语法
C++语言的基础语法决定了程序的结构和执行方式,是编写程序的基本组成部分。
3.1 数据类型
C++支持多种数据类型,分为基本数据类型、派生数据类型和用户定义类型。
3.1.1 基本数据类型
C++的基本数据类型用于存储简单的数值和字符信息。
| 数据类型 | 描述 | 示例 |
|---|---|---|
| int | 整型,存储整数 | int a = 10; |
| float | 单精度浮点型 | float b = 3.14; |
| double | 双精度浮点型 | double c = 2.71828; |
| char | 单个字符 | char d = 'A'; |
| bool | 布尔型,存储真或假 | bool e = true; |
| string | 字符串 | string s = "Hello"; |
3.1.2 派生数据类型
C++支持通过已有类型派生出复杂类型:
- 指针:存储变量的地址,例如:
int* p = &a; - 数组:存储多个同一类型的值,例如:
int arr[5] = {1, 2, 3, 4, 5}; - 函数:通过返回值和参数类型定义一个功能,例如:
int add(int a, int b) { return a + b; }
3.1.3 用户定义类型
C++允许用户自定义类型,增强了语言的灵活性。
- 结构体:用于组织相关数据:
struct Point {
    int x, y;
};
- 枚举:定义有限范围的变量:
enum Color { RED, GREEN, BLUE };
- 类:用于实现面向对象的设计,详见后续章节。
3.2 运算符
运算符是C++中用于操作数据和变量的符号。根据功能,可以分为以下几类。
3.2.1 算术运算符
| 运算符 | 描述 | 示例 | 结果 |
|---|---|---|---|
| + | 加法 | 5 + 3 | 8 |
| - | 减法 | 5 - 3 | 2 |
| * | 乘法 | 5 * 3 | 15 |
| / | 除法 | 5 / 2 | 2 |
| % | 取模 | 5 % 2 | 1 |
3.2.2 比较运算符
比较运算符用于比较两个值,结果为布尔值。
| 运算符 | 示例 | 描述 | 结果 |
|---|---|---|---|
| == | 5 == 5 | 等于 | true |
| != | 5 != 3 | 不等于 | true |
| > | 5 > 3 | 大于 | true |
| < | 5 < 3 | 小于 | false |
| >= | 5 >= 5 | 大于等于 | true |
| <= | 3 <= 5 | 小于等于 | true |
3.2.3 逻辑运算符
逻辑运算符用于连接多个条件。
| 运算符 | 描述 | 示例 | 结果 |
|---|---|---|---|
| && | 逻辑与 | (a > 0 && b > 0) | true |
| || | 逻辑或 | (a > 0 || b > 0) | true |
| ! | 逻辑非 | !(a > 0) | false |
假设
a和b均为一个大于0的值。
4. 流程控制
流程控制是程序逻辑的核心,决定了代码的执行顺序。C++支持条件语句和循环语句来实现不同的逻辑控制。
4.1 条件语句
条件语句用于根据某个条件的真假执行不同的代码。
4.1.1 if-else 语句
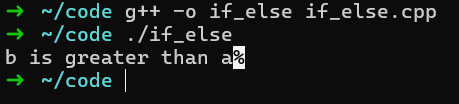
#include <iostream>
using namespace std;

int main() {
    int a = 10, b = 20;
    if (a > b) {
        cout << "a is greater than b";
    } else if (a == b) {
        cout << "a is equal to b";
    } else {
        cout << "b is greater than a";
    }
    return 0;
}
4.1.2 switch 语句
switch 语句用于根据不同的条件执行不同的代码块。
#include <iostream>
using namespace std;

int main() {
    int day = 3;
    switch (day) {
        case 1:
            cout << "Monday";
            break;
        case 2:
            cout << "Tuesday";
            break;
        case 3:
            cout << "Wednesday";
            break;
        default:
            cout << "Invalid day";
    }
    return 0;
}
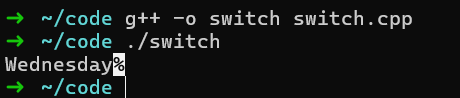
注意: break语句用于终止switch块,否则会继续执行后续的case。
4.2 循环语句
循环语句用于重复执行一段代码,直到满足某个条件。C++提供了for、while和do-while三种循环语句。
4.2.1 for 循环
for 循环是执行固定次数循环的首选。
基本语法:
for (初始化; 条件; 更新) { 循环体 }
#include <iostream>
using namespace std;

int main() {
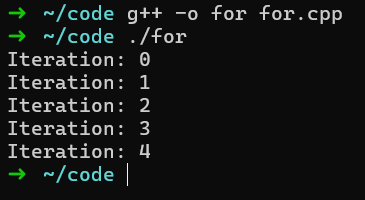
    for (int i = 0; i < 5; i++) {
        cout << "Iteration: " << i << endl;
    }
    return 0;
}
嵌套循环:在循环体内部嵌套另一个循环,这样可以实现更复杂的逻辑。
#include <iostream>
using namespace std;

int main() {
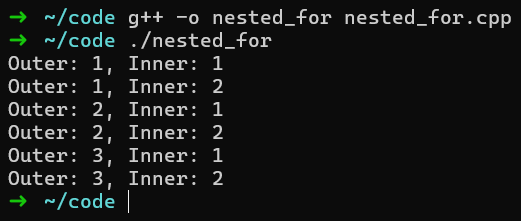
    for (int i = 1; i <= 3; i++) {
        for (int j = 1; j <= 2; j++) {
            cout << "Outer: " << i << ", Inner: " << j << endl;
        }
    }
    return 0;
}
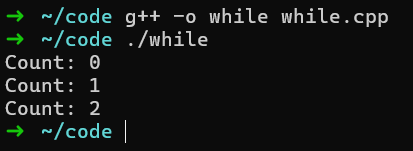
4.2.2 while 循环
while 循环在条件为真时重复执行。
基本语法:
while (条件) { 循环体 }
#include <iostream>
using namespace std;

int main() {
    int count = 0;
    while (count < 3) {
        cout << "Count: " << count << endl;
        count++;
    }
    return 0;
}
4.2.3 do-while 循环
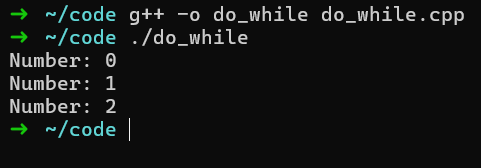
do-while 循环至少执行一次,然后根据条件判断是否继续。
基本语法:
do { 循环体 } while (条件);
#include <iostream>
using namespace std;

int main() {
    int num = 0;
    do {
        cout << "Number: " << num << endl;
        num++;
    } while (num < 3);
    return 0;
}
4.3 跳转语句
C++提供了几种跳转语句来控制循环的执行:
break:跳出循环。continue:跳过当前迭代,继续下一次循环。goto:转到指定标签(不推荐使用)。
示例代码点击下载:
#include <iostream>
using namespace std;

int main() {
    for (int i = 0; i < 5; i++) {
        if (i == 3)
            break;  // 跳出循环
        if (i == 1)
            continue;  // 跳过1的迭代
        cout << i << " ";
    }
    return 0;
}
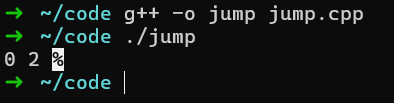
可以看到,break语句在i等于3时跳出循环,没有继续输出后面的3 4 ,continue语句在i等于1时跳过当前迭代,当仍然输出后后续的2。
5. 面向对象编程(OOP)
面向对象编程(OOP)是 C++ 的核心特性之一,通过封装、继承和多态等特性,使程序更具有可重用性、可扩展性和可维护性。
5.1 类与对象
5.1.1 定义类和创建对象
类是面向对象编程的基本单位,用于描述具有共同特征的对象。
#include <iostream>
#include <string>
using namespace std;

class Animal {
public:
    string name;

    void speak() {
        cout << name << " is speaking!" << endl;
    }
};

int main() {
    Animal dog; // 创建对象
    dog.name = "Dog";
    dog.speak();
    return 0;
}
说明:
- 类声明:
class Animal定义了一个类。 - 对象创建:
Animal dog创建了Animal类的一个实例。 - 访问成员变量和方法:通过
.运算符访问对象的属性和方法。
5.1.2 成员变量和成员函数
成员变量是类的属性,成员函数是类的行为。
class Person {
private:
    int age; // 私有成员变量

public:
    string name; // 公有成员变量

    // 构造函数
    Person(string n, int a) {
        name = n;
        age = a;
    }

    // 成员函数
    void displayInfo() {
        cout << "Name: " << name << ", Age: " << age << endl;
    }
};

int main() {
    Person john("John", 30);
    john.displayInfo();
    return 0;
}
说明:
- 访问控制:
private表示私有成员,public表示公有成员。 - 构造函数:用来初始化对象的成员变量。
5.1.3 构造函数与析构函数
构造函数和析构函数是类的特殊成员函数,分别在对象创建和销毁时调用。
class Example {
public:
    Example() {
        cout << "Constructor called" << endl;
    }

    ~Example() {
        cout << "Destructor called" << endl;
    }
};

int main() {
    Example obj;
    return 0;
}
说明:
- 构造函数:名称与类名相同,无返回值。
- 析构函数:在类名前加
~,无参数且无返回值。
5.2 继承
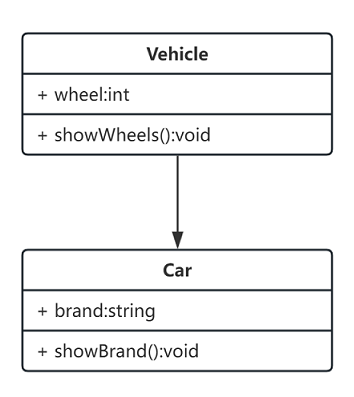
继承是 OOP 的重要特性,通过继承可以创建新的类(派生类),从现有类(基类)中获得其成员和行为。继承的语法是:在代码中和原来一样给出该类的名字,但在左括号前加一个冒号和基类的名字。
继承支持按级分类的概念。它可以使用现有类的所有功能,并在无需重新编写原来类的情况下对这些功能进行扩展。 继承的过程其实就是从一般到特殊的过程。
与继承相关的类类型:
- 基类:被继承的类,即"父类"或“超类”。
- 派生类:基于基类创建的新类,又称“子类”。派生类可以访问基类中所有的非私有成员。
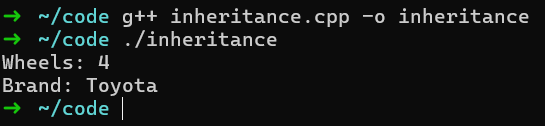
#include <iostream>
using namespace std;
class Vehicle {
   public:
    int wheels;

    void showWheels() { cout << "Wheels: " << wheels << endl; }
};

class Car : public Vehicle {
   public:
    string brand;

    void showBrand() { cout << "Brand: " << brand << endl; }
};

int main() {
    Car myCar;
    myCar.wheels = 4;
    myCar.brand = "Toyota";
    myCar.showWheels();
    myCar.showBrand();
    return 0;
}
5.3 多态
多态是 OOP 的核心特性之一,按字面的意思就是多种形态,指一个类实例的相同方法在不同情况下有不同表现形式。
多态机制使内部结构不同的对象可以共享相同的外部接口。即子类可以重写父类的某个函数,从而为这个函数提供不同于父类的行为。一个父类的多个子类可以为同一个函数提供不同的实现,从而在父类这个公共的接口下,表现出多种行为。 多态的使用场景:当类之间存在层次结构,并且类之间是通过继承关联时。这意味着,虽然针对不同对象的具体操作不同,但通过一个公共的类,它们的那些操作可以通过相同的方式予以调用。
5.3.1 静态多态(函数重载)
函数重载是静态多态的一种形式,它的表现就是允许多个函数同名但参数列表不同。示例代码点击下载如下:
#include <iostream>
using namespace std;

class Math {
   public:
    int add(int a, int b) { return a + b; }

    double add(double a, double b) { return a + b; }
};

int main() {
    Math math;
    cout << math.add(3, 4) << endl;      // 调用 int 版本
    cout << math.add(3.5, 4.5) << endl;  // 调用 double 版本
    return 0;
}

5.3.2 动态多态(虚函数)
动态多态则是针对不同对象的具体操作不同,但通过一个公共的类,它们的那些操作可以通过相同的方式予以调用,而这是通过虚函数实现的。
示例代码点击下载
#include <iostream>
using namespace std;

class Animal {
   public:
    virtual void speak() { cout << "Animal speaks" << endl; }
};

class Dog : public Animal {
   public:
    void speak() override { cout << "Dog barks" << endl; }
};

class Cat : public Animal {
   public:
    void speak() override { cout << "Cat meows" << endl; }
};

int main() {
    Animal* animal = new Dog();
    Animal* cat = new Cat();
    animal->speak();  // 调用 Dog 的 speak 实现
    cat->speak();     // 调用 Cat 的 speak 实现
    delete animal;
    delete cat;
    return 0;
}

说明:
- 使用
virtual关键字声明基类中的函数。 - 动态多态依赖于运行时决定调用哪种实现。
6. 现代C++特性
现代C++从C++11开始引入了许多强大的新特性,随后在C++14、C++17和C++20中进一步扩展。这些特性极大地提高了代码的简洁性、性能和可维护性。以下是现代C++中一些重要的特性及其示例。
6.1 Lambda表达式
Lambda表达式是一种匿名函数,可以在函数内部定义临时函数,并直接在代码中使用。这种特性非常适合简化回调函数和短期逻辑。
6.1.1 基本语法
Lambda表达式的基本语法由一个捕获列表,一个参数列表,一个返回类型(可省略)和一个函数体构成:
#include <iostream>
using namespace std;

int main() {
    // 等价于:auto add = [](int a, int b) -> int { return a + b; };
    auto add = [](int a, int b) { return a + b; };
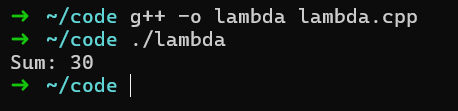
    cout << "Sum: " << add(10, 20) << endl;
    return 0;
}
6.1.2 捕获列表
Lambda表达式可以通过捕获列表捕获外部变量:
#include <iostream>
using namespace std;

int main() {
    int x = 10, y = 20;

    auto add = [x, y]() { return x + y; };  // 捕获x和y
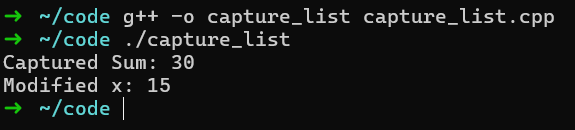
    cout << "Captured Sum: " << add() << endl;

    auto modify = [&x]() { x += 5; };  // 按引用捕获x
    modify();
    cout << "Modified x: " << x << endl;

    return 0;
}
说明:
[x, y]按值捕获变量。[&x]按引用捕获变量。[=]捕获所有变量(按值)。[&]捕获所有变量(按引用)。
6.1.3 泛型Lambda表达式
从C++14开始,Lambda支持自动推导参数类型,可以支持更多类型的输入:
#include <iostream>
using namespace std;

int main() {
    auto multiply = [](auto a, auto b) { return a * b; };
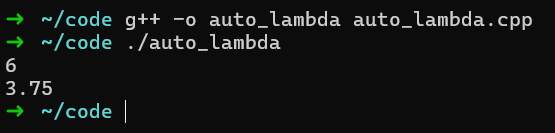
    cout << multiply(2, 3) << endl;      // 输出6
    cout << multiply(1.5, 2.5) << endl;  // 输出3.75
    return 0;
}
6.2 智能指针
C++提供了类的概念,而当我们像上面一样去new一个类的时候,在函数结束时要去手动的delete掉这个对象,否则会导致内存的泄露。
智能指针是现代C++中提供的一种内存管理工具,能够自动管理对象的生命周期,避免内存泄漏,当智能指针的计数为0时,智能指针会自动去释放掉内存的占用。C++11引入了三种主要的智能指针:std::unique_ptr、std::shared_ptr 和 std::weak_ptr。
6.2.1 unique_ptr
unique_ptr 是一种独占所有权的智能指针,不能被拷贝。
#include <iostream>
#include <memory>
using namespace std;

class MyClass {
   public:
    MyClass() { cout << "占用内存" << endl; }
    ~MyClass() { cout << "释放内存" << endl; }
};

int main() {
    unique_ptr<MyClass> p1 = make_unique<MyClass>();  // 创建一个unique_ptr
    // unique_ptr不能被复制
    // unique_ptr<int> p2 = p1; // 错误!

    // 但可以转移所有权
    unique_ptr<MyClass> p2 = move(p1);
    return 0;
}

6.2.2 shared_ptr
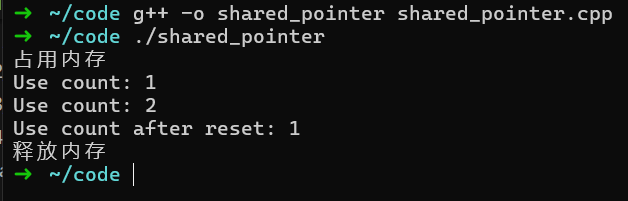
shared_ptr 是一种共享所有权的智能指针,多个 shared_ptr 可以共享同一个对象,多个shared_ptr指向一个对象时,引用数会叠加。
#include <iostream>
#include <memory>
using namespace std;

class MyClass {
   public:
    MyClass() { cout << "占用内存" << endl; }
    ~MyClass() { cout << "释放内存" << endl; }
};

int main() {
    shared_ptr<MyClass> p1 = make_shared<MyClass>();
    cout << "Use count: " << p1.use_count() << endl;  // 输出1
    shared_ptr<MyClass> p2 = p1;  // p1 和 p2 共享所有权
    cout << "Use count: " << p1.use_count() << endl;  // 输出2
    p2.reset();  // p2释放所有权
    cout << "Use count after reset: " << p1.use_count() << endl;  // 输出1
    return 0;
}
6.2.3 weak_ptr
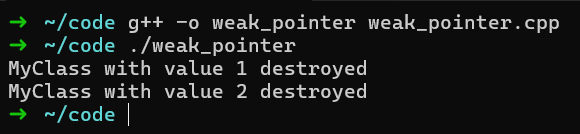
weak_ptr 是一种不影响对象生命周期的智能指针,weak_ptr并不会影响所指堆内存空间的引用计数。当 weak_ptr 指针的指向和某一shared_ptr相同时,weak_ptr并不会使所指堆内存的引用计数加 1;同样,当weak_ptr指针被释放时,之前所指堆内存的引用计数也不会因此而减1,因此可以用于解决循环引用问题。
#include <iostream>
#include <memory>
using namespace std;

class MyClass {
   public:
    int value;
    shared_ptr<MyClass> next;
    weak_ptr<MyClass> prev;  // 使用weak_ptr避免循环引用

    MyClass(int val) : value(val) {}
    ~MyClass() {
        cout << "MyClass with value " << value << " destroyed" << endl;
    }
};

int main() {
    shared_ptr<MyClass> node1 = make_shared<MyClass>(1);
    shared_ptr<MyClass> node2 = make_shared<MyClass>(2);

    node1->next = node2;
    node2->prev = node1;  // 避免循环引用

    return 0;
}
6.3 自动类型推导
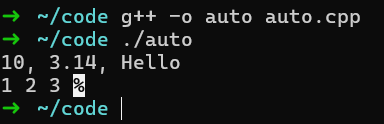
auto 关键字允许编译器根据上下文推导变量的类型,从C++11开始引入。
#include <iostream>
#include <vector>
using namespace std;

int main() {
    auto x = 10;      // 推导为int
    auto y = 3.14;    // 推导为double
    auto z = "Hello"; // 推导为const char*

    cout << x << ", " << y << ", " << z << endl;

    vector<int> vec = {1, 2, 3};
    for (auto elem : vec) {
        cout << elem << " ";
    }

    return 0;
}
6.4 nullptr
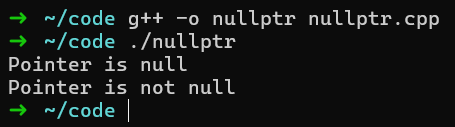
在C语言中,空指针可以使用(void *)0;来表示,且标准库中也是如此定义,但在C++语言中,由于多态的存在,可能会导致某些函数重载时的误会,因而空指针的值就不能表示为(void *)0;。因此C++11引入了nullptr来替代C语言中的NULL,表示空指针。
#include <iostream>
using namespace std;

void checkPointer(int* ptr) {
    if (ptr == nullptr) {
        cout << "Pointer is null" << endl;
    } else {
        cout << "Pointer is not null" << endl;
    }
}

int main() {
    int* p = nullptr; // 使用nullptr初始化
    checkPointer(p);

    int value = 10;
    p = &value;
    checkPointer(p);

    return 0;
}
nullptr在C++中可以完全替代NULL,而无需其他操作。
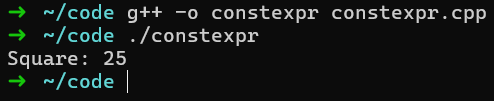
6.5 constexpr
constexpr 用于定义在编译期可计算的常量,从C++11开始引入,并在C++14中增强。
constexpr函数在编译时运行,从而提高程序性能。- 变量也可以使用
constexpr定义为常量。
#include <iostream>
using namespace std;

constexpr int square(int x) {
    return x * x;
}

int main() {
    constexpr int value = square(5);  // 在编译期计算,提高性能
    cout << "Square: " << value << endl;
    return 0;
}
6.6 范围for循环
范围for循环简化了对容器的迭代操作,可以快速获得容器内每个元素,从C++11开始引入。
#include <iostream>
#include <vector>
using namespace std;

int main() {
    vector<int> numbers = {1, 2, 3, 4, 5};
    for (int num : numbers) {
        cout << num << " ";
    }
    cout << endl;
    return 0;
}
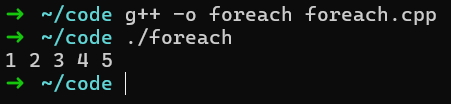
说明: 范围for循环是C++11的新特性,适用于标准容器(如vector、map等)和自定义类。
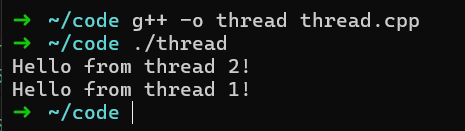
6.7 多线程支持
C++11标准库引入了对多线程的支持,包括线程管理、互斥锁和条件变量。
#include <iostream>
#include <thread>
using namespace std;

void printMessage(const string& message) {
    cout << message << endl;
}

int main() {
    // 创建和管理线程
    thread t1(printMessage, "Hello from thread 1!");
    thread t2(printMessage, "Hello from thread 2!");
    // 等待线程完成
    t1.join();
    t2.join();
    return 0;
}
7. C++标准库(STL)
C++ 标准模板库(Standard Template Library,STL)是一套功能强大的 C++ 模板类和函数的集合,它提供了一系列通用的、可复用的算法和数据结构,可以极大的提高C++开发效率。
7.1 容器
STL提供了多种类型的容器,每种容器都有不同的特性和用途。下面是一些常用容器的详细介绍。
7.1.1 vector(动态数组)
vector 是最常用的顺序容器,它能动态地向尾部扩展大小,可以存储任意类型的元素。vector 的元素存储在连续的内存块中,因此它支持快速的随机访问。
vector模型如图7.1.1所示:

vector 常用成员函数:
push_back():在vector的末尾插入一个元素。pop_back():删除vector末尾的元素。size():返回vector中元素的个数。empty():检查vector是否为空。at():访问指定位置的元素,且会进行越界检查。front():返回第一个元素。back():返回最后一个元素。
#include <iostream>
#include <vector>
using namespace std;

int main() {
    // 创建一个空的vector
    vector<int> nums;

    // 向vector中添加元素
    nums.push_back(10);
    nums.push_back(20);
    nums.push_back(30);

    // 访问元素
    cout << "First element: " << nums[0] << endl;
    cout << "Second element: " << nums.at(1) << endl;

    // 输出所有元素
    for (int num : nums) {
        cout << num << " ";
    }
    return 0;
}
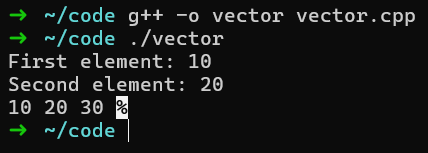
运行结果如图7.1.2所示:vector是一个动态数组,可以根据需要动态扩展大小,支持快速的随机访问,是最常用的容器之一。
7.1.2 deque(双端队列)
deque 是一个支持从两端高效插入和删除元素的容器,适用于需要从两端操作的场景。
deque模型如图7.1.3所示:
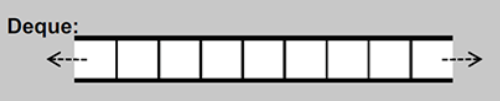
与vector相比,deque由于在两端也可以进行插入和删除操作,因此常用的成员函数增加了push_front()和pop_front()。
deque 常用成员函数:
push_front():在deque的前端插入一个元素。push_back():在deque的后端插入一个元素。pop_front():删除deque前端的元素。pop_back():删除deque后端的元素。size():返回deque中元素的个数。empty():检查deque是否为空。at():访问指定位置的元素,且会进行越界检查。front():返回第一个元素。back():返回最后一个元素。
#include <iostream>
#include <deque>
using namespace std;

int main() {
    deque<int> dq = {1, 2, 3, 4};
    dq.push_front(0); // 在前端插入
    dq.push_back(5);  // 在后端插入

    for (int num : dq) {
        cout << num << " ";
    }
    return 0;
}
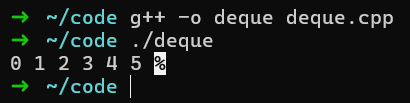
运行结果如图7.1.4所示:deque比vector更适合在两端进行插入和删除操作,是一个双端队列。
7.1.3 list(双向链表)
list 是一个双向链表,支持在任意位置快速插入和删除,但随机访问性能较差,并且相较于vector和deque,list没有提高随机访问迭代器。
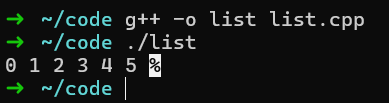
list模型如图7.1.5所示:

list 常用成员函数:
push_front():在list的前端插入一个元素。push_back():在list的后端插入一个元素。pop_front():删除list前端的元素。pop_back():删除list后端的元素。size():返回list中元素的个数。empty():检查list是否为空。front():返回第一个元素。back():返回最后一个元素。
#include <iostream>
#include <list>
using namespace std;

int main() {
    list<int> lst = {1, 2, 3, 4};
    lst.push_back(5);
    lst.push_front(0);

    for (int num : lst) {
        cout << num << " ";
    }
    return 0;
}
7.1.4 set(集合)
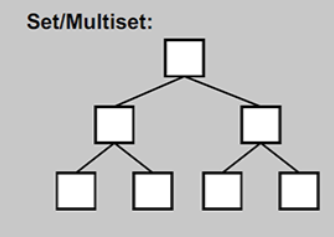
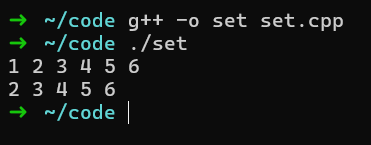
set 是一个按升序排列的关系型容器,允许存储唯一的元素,无法存储重复元素,使用红黑树实现。
set模型如图7.1.7所示:
set 常用成员函数:
insert():插入元素。erase():删除元素。size():返回set中元素的个数。empty():检查set是否为空。
#include <iostream>
#include <set>
using namespace std;

int main() {
    set<int> s = {5, 1, 2, 4, 3};
    s.insert(6);  // 插入元素
    for (int num : s) {
        cout << num << " ";  // 自动按升序排列
    }
    cout << endl;

    s.erase(1);  // 删除元素
    for (int num : s) {
        cout << num << " ";
    }
    cout << endl;
    return 0;
}
7.1.5 map(映射)
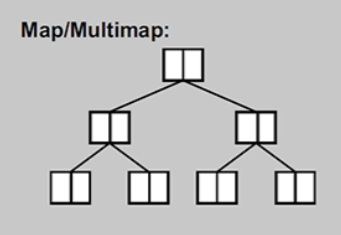
map 是一个存储键值对的容器,键值对会自动按键升序排列,且每个键只能出现一次,也是通过红黑树实习的。
map模型如图7.1.9所示:
map 常用成员函数:
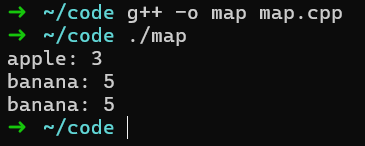
insert():插入键值对。erase():删除键值对。size():返回map中键值对的个数。empty():检查map是否为空。
#include <iostream>
#include <map>
using namespace std;

int main() {
    map<string, int> m;
    // 插入元素
    m["apple"] = 3;
    m["banana"] = 5;
    for (auto& pair : m) {
        cout << pair.first << ": " << pair.second << endl;
    }

    // 删除元素
    m.erase("apple");
    for (auto& pair : m) {
        cout << pair.first << ": " << pair.second << endl;
    }
    return 0;
}
7.1.6 unordered_set(无序集合)
unordered_set 是一个无序容器,它使用哈希表来存储元素,查找操作具有常数时间复杂度。
unordered_set模型如图7.1.11所示:
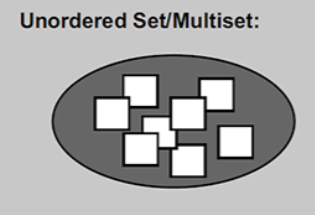
unordered_set 常用成员函数与set相同,二者之间的区别仅在于元素的存储方式。
#include <iostream>
#include <unordered_set>
using namespace std;

int main() {
    unordered_set<int> us = {5, 1, 2, 4, 3};
    us.insert(6);

    for (int num : us) {
        cout << num << " "; // 元素顺序不固定
    }
    return 0;
}

7.1.7 unordered_map(无序映射)
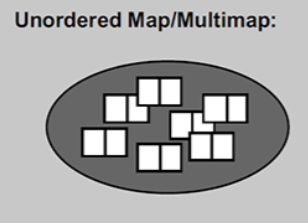
unordered_map 是一个基于哈希表的键值对容器,类似于 map,但其元素无序。
unordered_map模型如图7.1.13所示:
unordered_map 常用成员函数与map相同,二者之间的区别仅在于元素的存储方式。
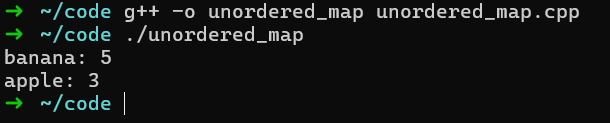
#include <iostream>
#include <unordered_map>
using namespace std;

int main() {
    unordered_map<string, int> umap;
    umap["apple"] = 3;
    umap["banana"] = 5;

    // 元素顺序不固定
    for (auto& pair : umap) {
        cout << pair.first << ": " << pair.second << endl;
    }
    return 0;
}
7.2 常用算法
STL还提供了一组强大的算法,可以与容器一起使用,执行各种操作。以下是一些常见的算法。
7.2.1 sort(排序)
sort 用于对容器中的元素进行排序,默认按升序排列。
#include <iostream>
#include <vector>
#include <algorithm>
using namespace std;

int main() {
    vector<int> nums = {4, 2, 5, 1, 3};
    sort(nums.begin(), nums.end());

    for (int num : nums) {
        cout << num << " ";
    }
    return 0;
}
7.2. reverse(反转)
reverse 用于将容器中的元素顺序反转。
#include <iostream>
#include <vector>
#include <algorithm>
using namespace std;

int main() {
    vector<int> nums = {1, 2, 3, 4, 5};
    reverse(nums.begin(), nums.end());

    for (int num : nums) {
        cout << num << " ";
    }
    return 0;
}
7.2.3 find(查找)
find 用于查找容器中的特定元素,返回一个指向该元素的迭代器,如果未找到返回 end()。
#include <iostream>
#include <vector>
#include <algorithm>
using namespace std;

int main() {
    vector<int> nums = {1, 2, 3, 4, 5};
    auto it = find(nums.begin(), nums.end(), 3);

    if (it != nums.end()) {
        cout << "Found " << *it << endl;
    } else {
        cout << "Not Found!" << endl;
    }
    return 0;
}
7.2.4 count(计数)
count 用于统计容器中某个元素的出现次数。
#include <iostream>
#include <vector>
#include <algorithm>
using namespace std;

int main() {
    vector<int> nums = {1, 2, 3, 4, 1, 5, 1};
    int count_of_1 = count(nums.begin(), nums.end(), 1);

    cout << "Number 1 appears " << count_of_1 << " times." << endl;
    return 0;
}
7.2.5 accumulate(累加)
accumulate 用于计算容器中元素的总和。
#include <iostream>
#include <vector>
#include <numeric>
using namespace std;

int main() {
    vector<int> nums = {1, 2, 3, 4, 5};
    int sum = accumulate(nums.begin(), nums.end(), 0);

    cout << "Sum: " << sum << endl;
    return 0;
}
7.2.6 lower_bound / upper_bound(查找下界/上界)
lower_bound 返回一个指向第一个不小于目标元素的迭代器,而 upper_bound 返回指向第一个大于目标元素的迭代器。
#include <iostream>
#include <vector>
#include <algorithm>
using namespace std;

int main() {
    vector<int> nums = {1, 2, 4, 4, 5, 6};
    auto lb = lower_bound(nums.begin(), nums.end(), 4);
    auto ub = upper_bound(nums.begin(), nums.end(), 4);

    cout << "Lower bound: " << *lb << endl;
    cout << "Upper bound: " << *ub << endl;

    return 0;
}
7.2.7 merge(合并两个已排序的容器)
merge 用于将两个已排序的容器合并成一个新的排序容器。
#include <iostream>
#include <vector>
#include <algorithm>
using namespace std;

int main() {
    vector<int> nums1 = {1, 3, 5, 7};
    vector<int> nums2 = {2, 4, 6, 8};
    vector<int> merged;

    merge(nums1.begin(), nums1.end(), nums2.begin(), nums2.end(), back_inserter(merged));

    for (int num : merged) {
        cout << num << " ";
    }

    return 0;
}
7.2.8 remove / remove_if(删除元素)
remove 和 remove_if 用于删除容器中的元素,remove_if 根据给定的条件删除元素。
#include <iostream>
#include <vector>
#include <algorithm>
using namespace std;

int main() {
    vector<int> nums = {1, 2, 3, 4, 5, 6};
    auto it = remove(nums.begin(), nums.end(), 4); // 删除值为4的元素

    nums.erase(it, nums.end()); // 移除“被删除”的元素

    for (int num : nums) {
        cout << num << " ";
    }
    return 0;
}
8. 异常处理
C++提供了一种机制用于在程序运行时处理错误或异常情况,避免程序崩溃。异常处理可以帮助我们在发生错误时以优雅的方式退出或修复问题,而不是让程序直接崩溃。C++的异常处理由三部分组成:throw、try和catch。
8.1 基本的异常处理
在C++中,异常是通过 throw 关键字抛出的,然后通过 try 块捕获和catch块处理。
语法:
try {
    // 可能会抛出异常的代码
    throw exception_type;  // 抛出异常
} catch (exception_type& e) {
    // 处理异常的代码
    // e 是捕获的异常对象
}
#include <iostream>
using namespace std;

int divide(int a, int b) {
    if (b == 0) {
        throw "Division by zero error";  // 抛出字符串类型的异常
    }
    return a / b;
}

int main() {
    try {
        cout << divide(10, 2) << endl;   // 正常除法
        cout << divide(10, 0) << endl;   // 会抛出异常
    } catch (const char* msg) {
        cout << "Caught an exception: " << msg << endl;
    }
    return 0;
}
运行结果如图8.1.1所示:

在上述代码中,当除数为0时,程序会抛出异常,并通过 catch 捕获该异常并输出错误信息。
8.2 异常类型
C++允许使用不同类型的异常,通常有两种常见方式:
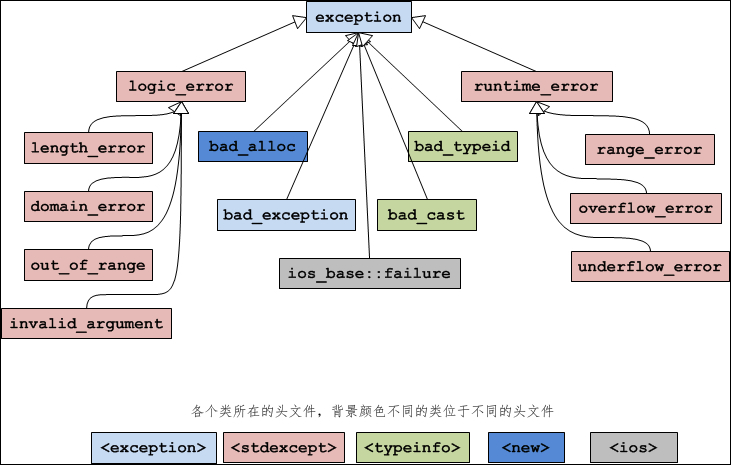
- 标准异常类:C++ 提供了一系列标准的异常,定义在
exception中,我们可以在程序中使用这些标准的异常。它们是以父子类层次结构组织起来的,如图8.2.1所示: - 内置异常:如整数、字符数组等,C++允许任何类型的对象作为异常抛出。
#include <iostream>
#include <stdexcept>
using namespace std;

void throw_runtime_error() {
    throw runtime_error("Runtime error occurred");
}

int main() {
    try {
        throw_runtime_error();
    } catch (const runtime_error& e) {
        cout << "Caught exception: " << e.what() << endl;
    }
    return 0;
}
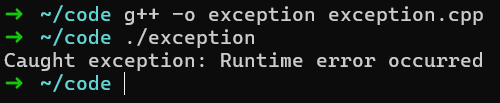
运行结果如图8.2.2所示:
8.3 捕获多个异常
C++ 允许在同一个 try-catch 块中捕获多种不同类型的异常。
#include <iostream>
#include <stdexcept>
using namespace std;

void test_function(int val) {
    if (val == 0) {
        throw runtime_error("Runtime error");
    } else if (val < 0) {
        throw invalid_argument("Negative value error");
    } else {
        cout << "Value is " << val << endl;
    }
}

int main() {
    try {
        test_function(0);  // 将抛出 runtime_error
    } catch (const runtime_error& e) {
        cout << "Caught runtime_error: " << e.what() << endl;
    } catch (const invalid_argument& e) {
        cout << "Caught invalid_argument: " << e.what() << endl;
    }

    try {
        test_function(-5); // 将抛出 invalid_argument
    } catch (const runtime_error& e) {
        cout << "Caught runtime_error: " << e.what() << endl;
    } catch (const invalid_argument& e) {
        cout << "Caught invalid_argument: " << e.what() << endl;
    }

    return 0;
}

这里演示了如何在同一个 try-catch 块中捕获不同类型的异常。不同的 catch 块会按顺序检查异常类型。
8.4 异常的传播
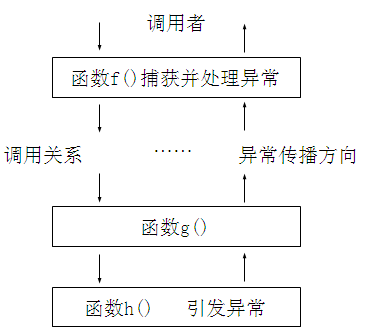
当抛出异常时,程序控制流会被中断,程序会从当前函数返回并进入上层调用函数的 catch 块,直到异常被捕获或程序终止。如果异常没有被捕获,它会继续向上传递,传递过程如图8.4.1所示:
#include <iostream>
#include <stdexcept>
using namespace std;

void f() {
    throw runtime_error("Error in f");
}

void g() {
    f();  // 抛出异常
}

int main() {
    try {
        g();  // 捕获异常
    } catch (const runtime_error& e) {
        cout << "Caught exception: " << e.what() << endl;
    }

    return 0;
}

在上面的例子中,f() 抛出了异常,但 g() 并没有捕获它。异常会向上传递到 main() 函数的 catch 块,最后被捕获。
8.5 自定义异常类
C++允许通过继承 std::exception 来定义自定义的异常类型。这样可以提供更多关于错误的信息。
#include <iostream>
#include <stdexcept>
using namespace std;

class MyException : public exception {
public:
    const char* what() const noexcept override {
        return "My custom exception occurred";
    }
};

void test_custom_exception() {
    throw MyException();  // 抛出自定义异常
}

int main() {
    try {
        test_custom_exception();
    } catch (const MyException& e) {
        cout << "Caught exception: " << e.what() << endl;
    }

    return 0;
}

在此示例中,我们通过继承 std::exception 类创建了一个名为 MyException 的自定义异常类,并重写了 what() 方法以返回自定义错误消息。