AHD摄像头
支持8路航插接口AHD摄像头输入点击购买,每路支持720p@30fps分辨率或4路1080P航插接口AHD摄像头输入(购买需备注需求)。
更新固件
若固件不符合,烧录 最新固件 烧录方法参阅 《使用USB线升级固件》一章。
AHD摄像头对应设备节点
- Cmd
8路720P
| AHD | 设备节点 |
|---|---|
| AHD8 | /dev/video0 |
| AHD7 | /dev/video1 |
| AHD6 | /dev/video2 |
| AHD5 | /dev/video3 |
| AHD4 | /dev/video8 |
| AHD3 | /dev/video10 |
| AHD2 | /dev/video11 |
| AHD1 | /dev/video12 |
4路1080P
| AHD | 设备节点 |
|---|---|
| AHD8 | /dev/video0 |
| AHD7 | /dev/video1 |
| AHD6 | /dev/video2 |
| AHD5 | /dev/video3 |
修改测试脚本
修改/rockchip-test/camera/camera_rkisp_test.sh
打开camera_rkisp_test.sh,然后去掉里面的最后一行后加入:
- Cmd
8路720P
DISPLAY=:0.0 gst-launch-1.0 v4l2src device=/dev/video0 ! video/x-raw,format=NV12,width=1280,height=720,framerate=30/1 ! autovideosink &
gst-launch-1.0 v4l2src device=/dev/video1 ! video/x-raw,format=NV12,width=1280,height=720,framerate=30/1 ! autovideosink &
gst-launch-1.0 v4l2src device=/dev/video2 ! video/x-raw,format=NV12,width=1280,height=720,framerate=30/1 ! autovideosink &
gst-launch-1.0 v4l2src device=/dev/video3 ! video/x-raw,format=NV12,width=1280,height=720,framerate=30/1 ! autovideosink &
gst-launch-1.0 v4l2src device=/dev/video8 ! video/x-raw,format=NV12,width=1280,height=720,framerate=30/1 ! autovideosink &
gst-launch-1.0 v4l2src device=/dev/video10 ! videoconvert ! video/x-raw,format=NV12,width=1280,height=720,framerate=30/1 ! autovideosink &
gst-launch-1.0 v4l2src device=/dev/video11 ! videoconvert ! video/x-raw,format=NV12,width=1280,height=720,framerate=30/1 ! autovideosink &
gst-launch-1.0 v4l2src device=/dev/video12 ! videoconvert ! video/x-raw,format=NV12,width=1280,height=720,framerate=30/1 ! autovideosink &
4路1080P
DISPLAY=:0.0 gst-launch-1.0 v4l2src device=/dev/video0 ! video/x-raw,format=NV12,width=1920,height=1080,framerate=30/1 ! autovideosink &
gst-launch-1.0 v4l2src device=/dev/video1 ! video/x-raw,format=NV12,width=1920,height=1080,framerate=30/1 ! autovideosink &
gst-launch-1.0 v4l2src device=/dev/video2 ! video/x-raw,format=NV12,width=1920,height=1080,framerate=30/1 ! autovideosink &
gst-launch-1.0 v4l2src device=/dev/video3 ! video/x-raw,format=NV12,width=1920,height=1080,framerate=30/1 ! autovideosink &
若单独测试一路AHD,务必加上sudo执行:
sudo gst-launch-1.0 -v v4l2src device=/dev/video0 ! video/x-raw, format=NV16,width=1280, height=720, framerate=30/1 ! fpsdisplaysink sync=false
验证测试脚本
sudo /rockchip-test/camera/camera_rkisp_test.sh
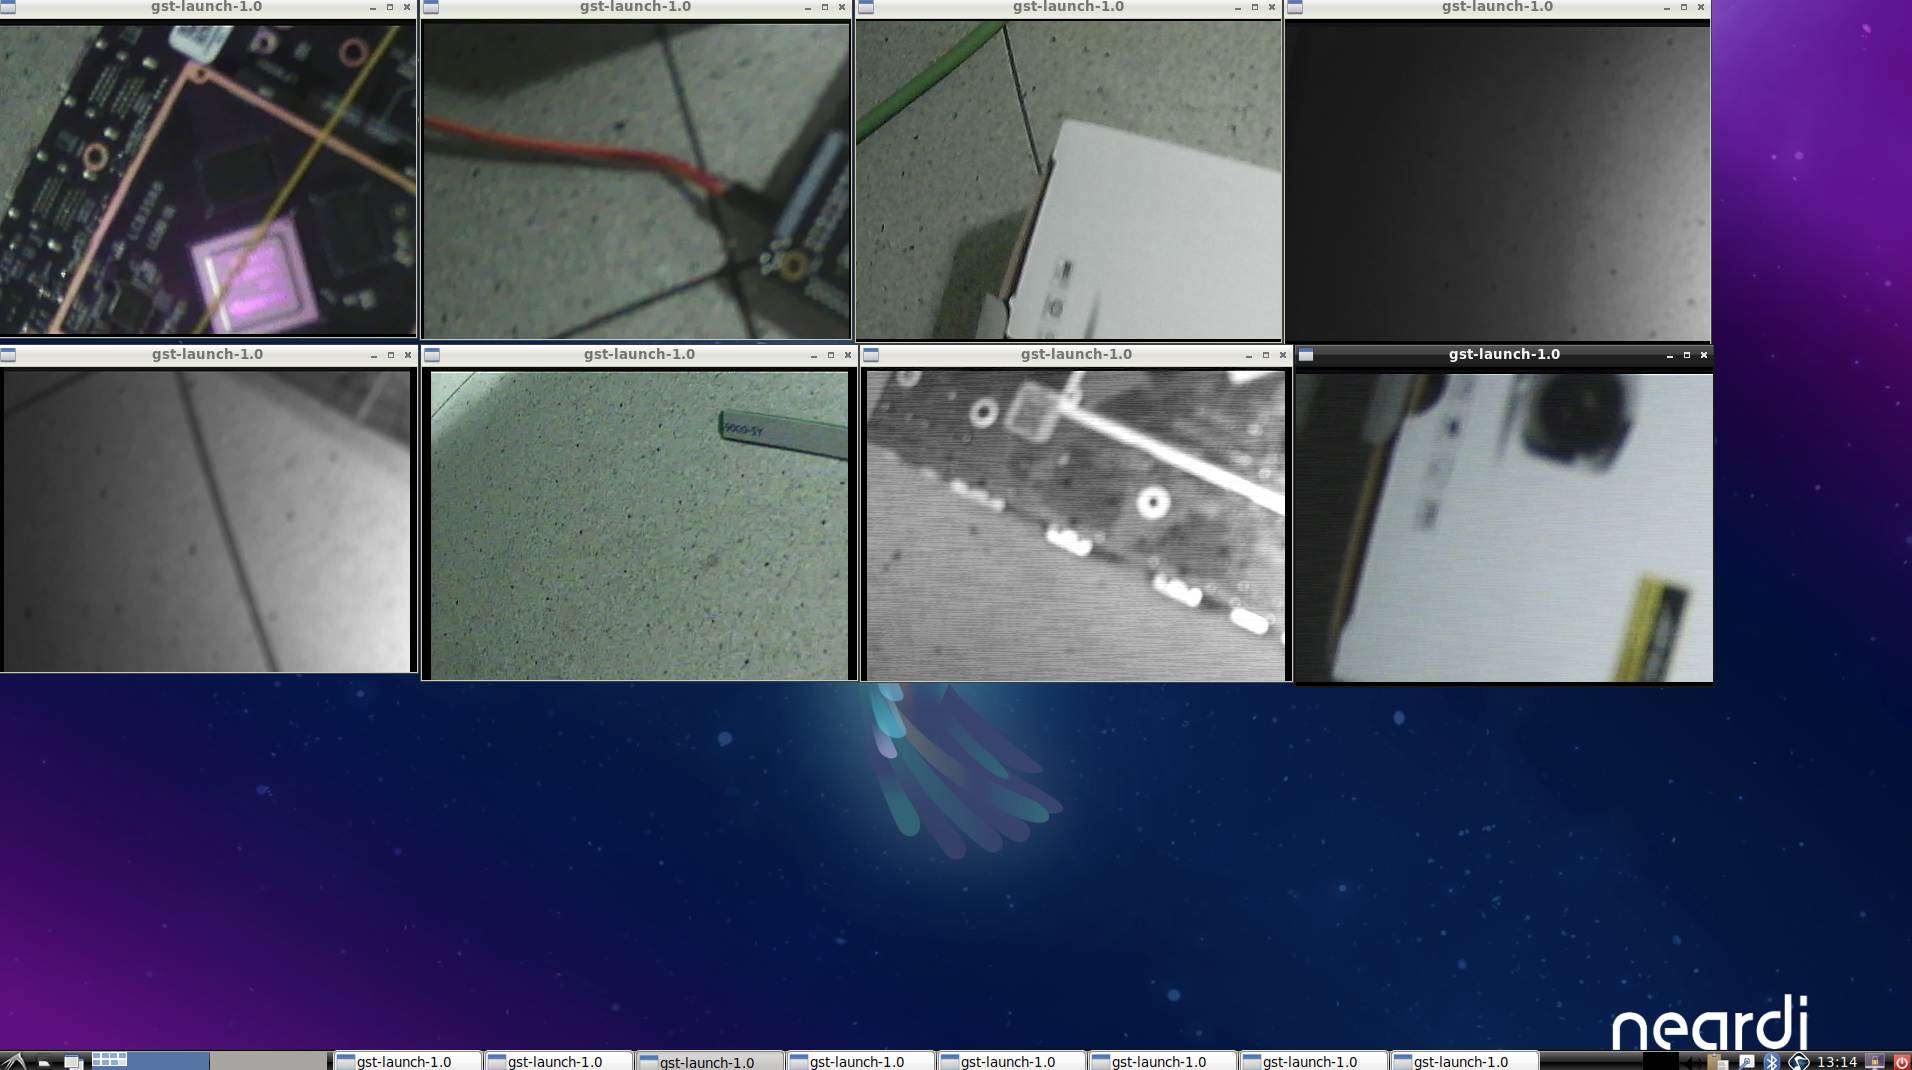
执行成功结果:
neardi@LPA3588:~$ sudo /rockchip-test/camera/camera_rkisp_test.sh
Start RKISP Camera Preview!
Setting pipeline to PAUSED ...
Pipeline is live and does not need PREROLL ...
Pipeline is PREROLLED ...
Setting pipeline to PLAYING ...
New clock: GstSystemClock
Setting pipeline to PAUSED ...
...
Redistribute latency...
0:22:57.3 / 99:99:99.
FAQ
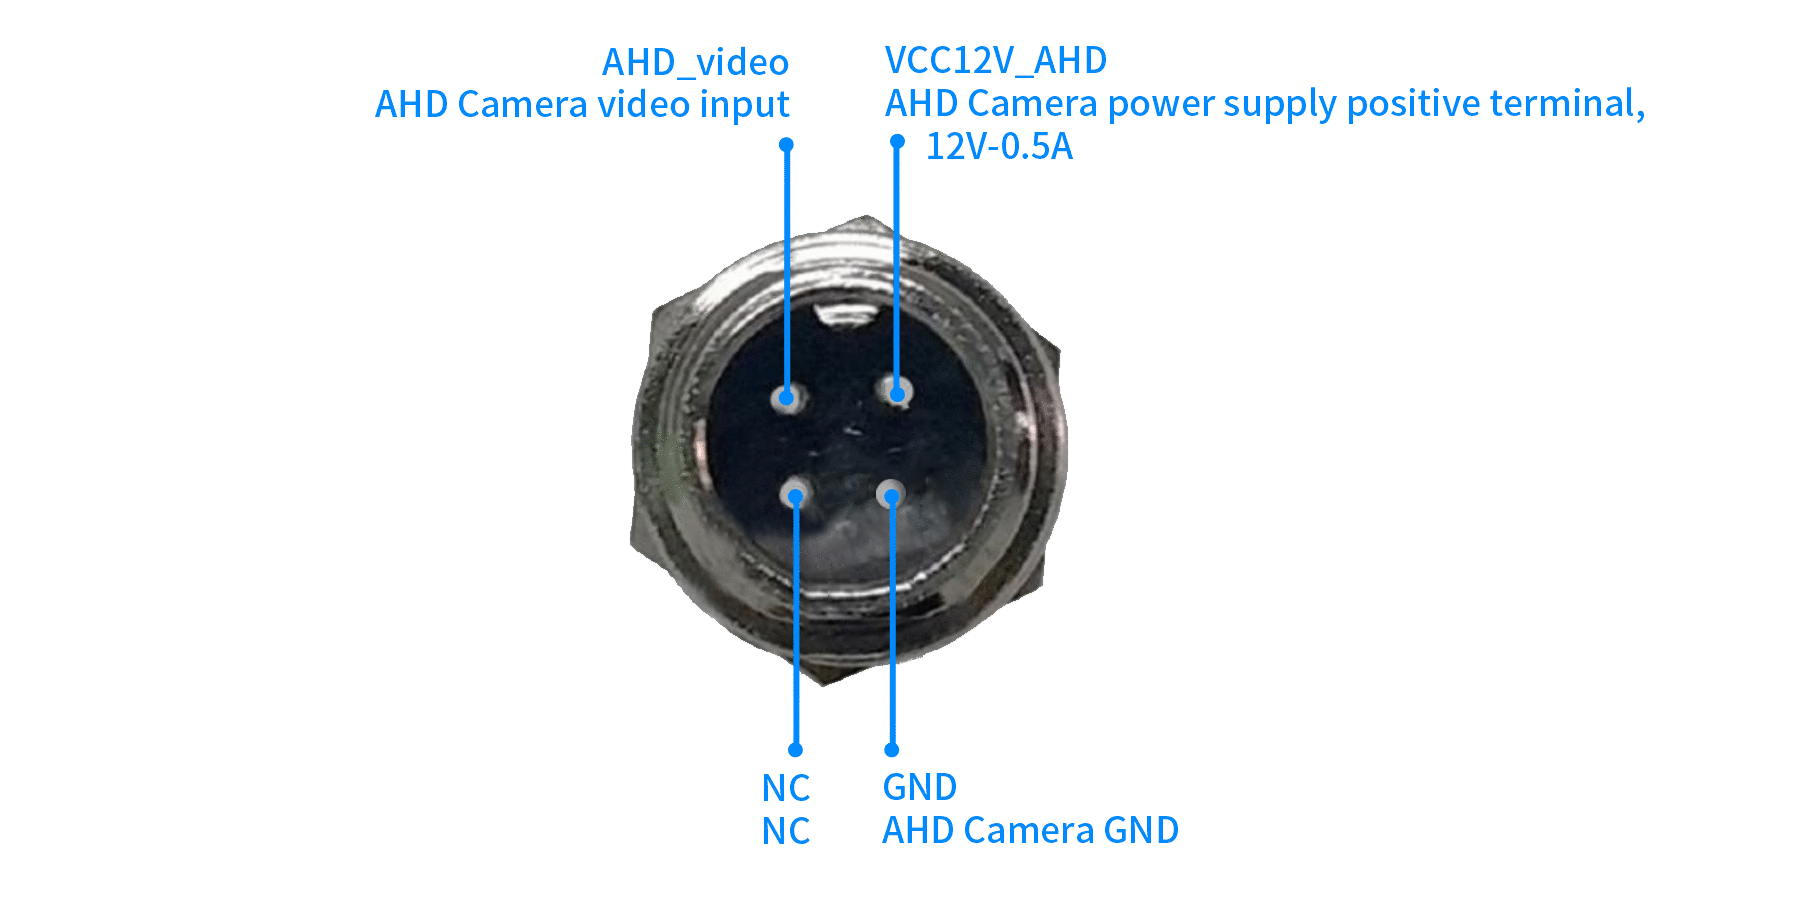
AHD摄像头pin脚如何定义的?
AHD摄像头为什么不出图?
简单排查
- 摄像头确保是
720p@25/30fps分辨率。 - 8路摄像头使用同一分辨率和帧率;不要混用,例如AHD1接720p,AHD2接1080p。
- 不能热插拔。
- 若固件是自行编译的,确保SDK升级到最新的,
V4.0及以上。 - 检查电源,使用
DC 9-36V电源。 - 测试Neardi配套的摄像头,再对比自行购买的摄像头。
抓图排查
使用v4l2-ctl工具抓图测试
# AHD1抓图
v4l2-ctl -d /dev/video0  --set-fmt-video=width=1280,height=720,pixelformat=NV12  --stream-mmap=3  --stream-skip=3  --stream-to=/tmp/ahd.out  --stream-count=1  --stream-poll
抓图正常返回结果,否则为异常:
<<<<